

Shop Projects: Mobile Lumber and Plywood Storage Cart
Mobile Lumber & Plywood Storage Cart
Wall space in my shop is difficult to come by and my garage isn’t even a full clear 8’ in height so I decided to take plywood and lumber storage to a mobile rack. In this video I show you how I designed and built my own custom rolling cart out of inexpensive easily sourced materials and with simply but sturdy joinery. Even fully loaded it is a breeze to move around the shop.
The detailed plans are done but over the holidays I will be revising them with final changes I made, and they will be released on my website. I will post on social media when the plans are available.


1. Plans Review & Parts Cutting
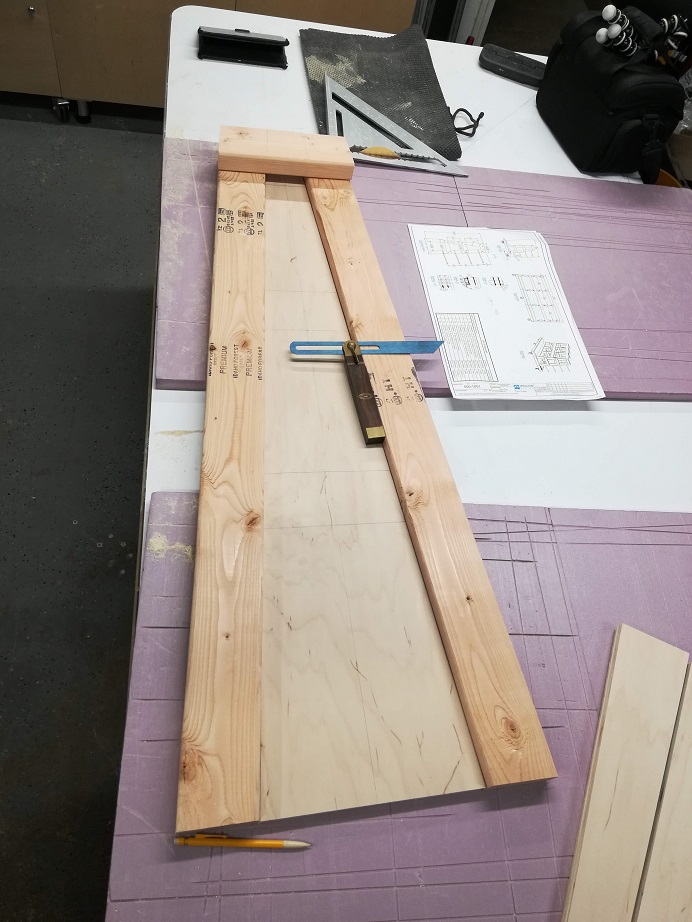
The first step is to familiarize yourself with the project plans and to look at the cut lists. I’ve provided a cut list so that you can take it right to the saw and get to work. The first parts I decided to cut were for the A-frames as they have angled cuts that require some fine tuning to get right. Set your miter saw to 5 degrees and layout the dimensions for cutting. Use a stop block to cut all of the parts the same length and cut all of the angled parts at once before resetting the angle of the miter saw.
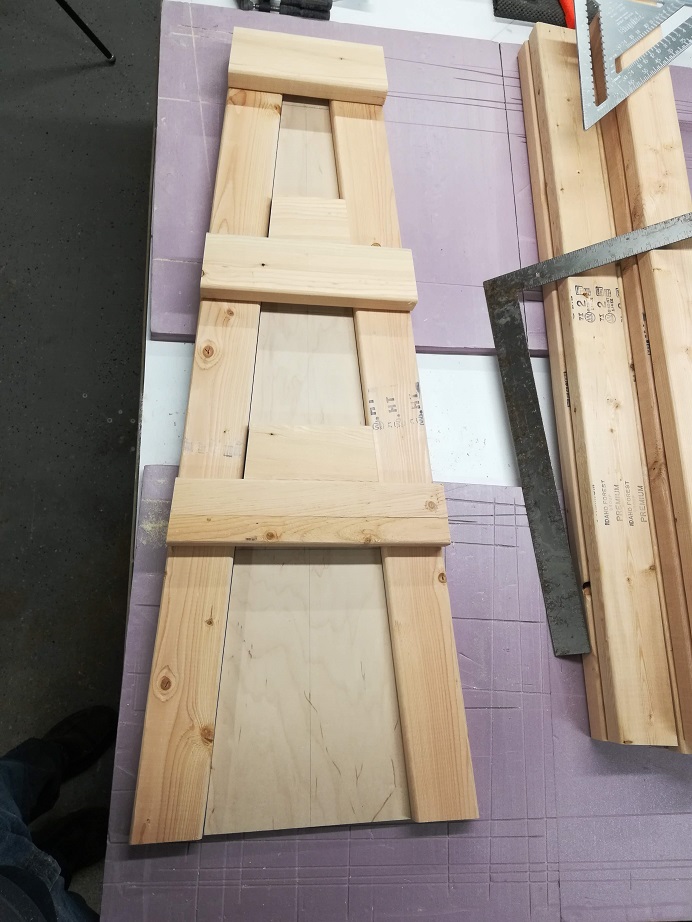
I decided to fabricate a template that would serve as a story stick for assembling the four frames the same. This requires ripping a piece of plywood, cutting down the angles with a saw based on the plan dimensions, and adding stop blocks to butt the rails up to on the plywood base. Once you have the template and frame parts cut you can start drilling holes.
2. Drilling the Conduit Holes
I used a ¾” drill bit for this even though the conduit OD is around 11/16”. This makes for a slightly looser hole but it works fine. If you want a close fit you can try an on size drill bit. A forestner bit in the drill press works best for this, setting a fence to drill centerline on the 2x4s. Layout the centerline marks on one piece and put all four together on your bench to transfer the lines all in one shot.
Drill the holes approximately full depth leaving 1/2” of material for the end of the pipes to butt up against in the hole. (3” deep) Once the holes are all drilled you can move onto assembly of the a-frames.
3. A-Frame Assembly
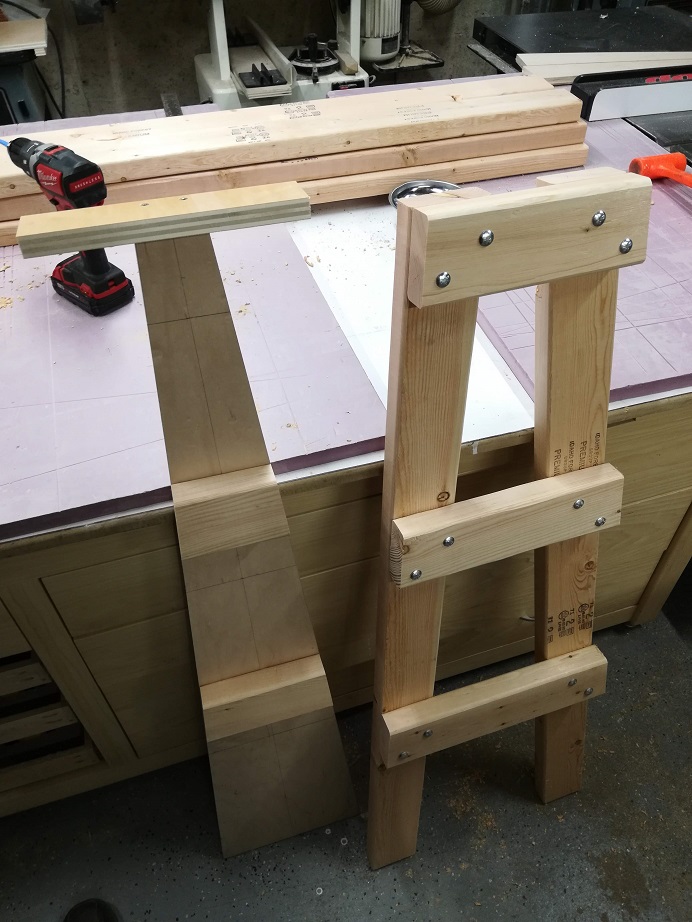
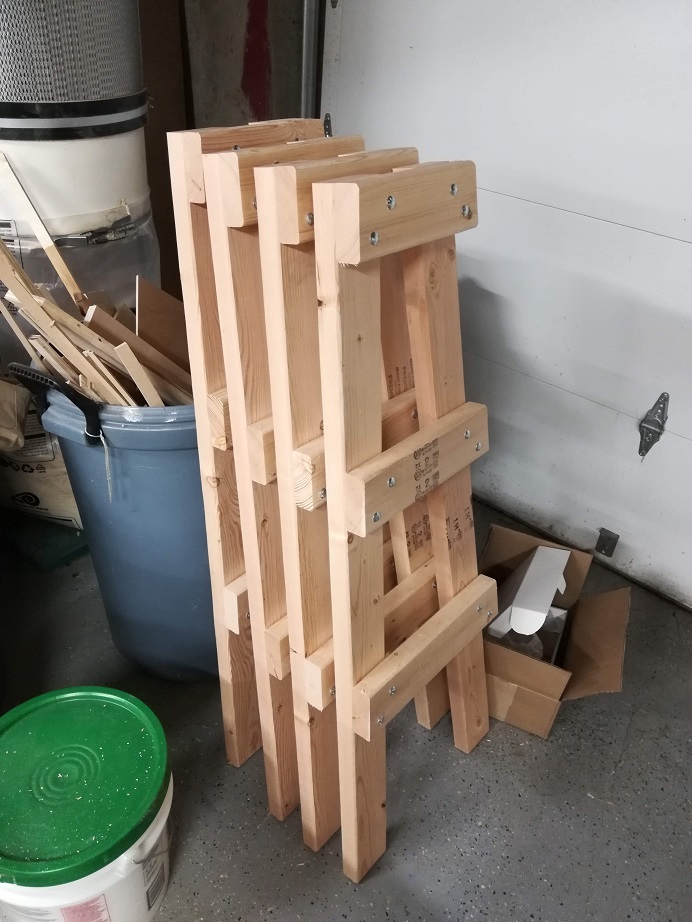
Assemble the parts on your jig holding them firm or with clamps and drilling ¼” clearance holes in the pattern you see in the photos and video. Insert ¼” carriage bolts in all of the holes and flip the frame over. Fasten them in place with washers, nuts, and thread-locker such as Loctite. You can also just use nylon locknuts.


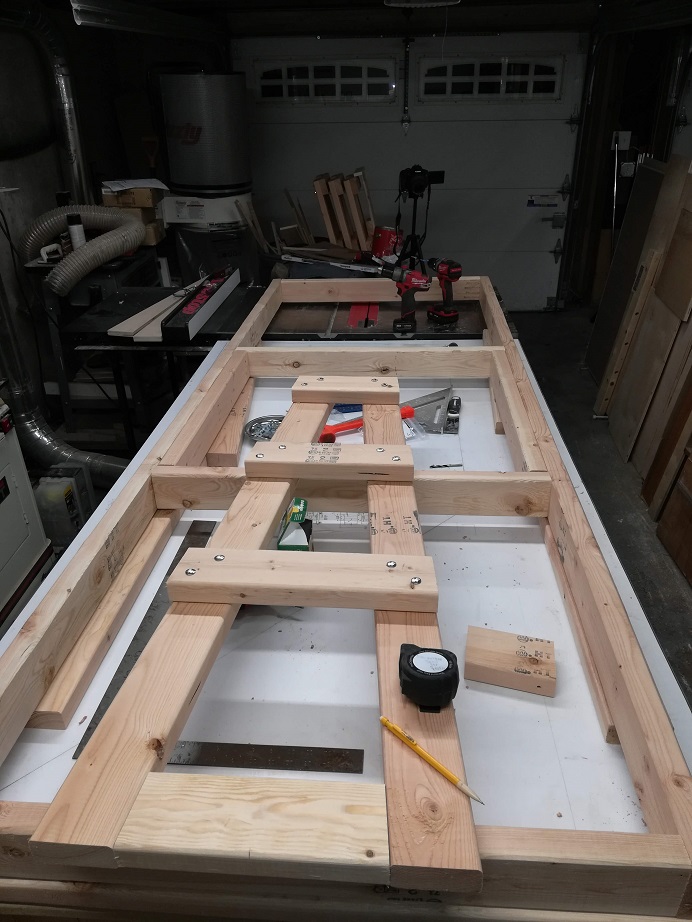
4. Base Frame Assembly
With the A-frames assembled you can start cutting the parts for the base frame. Set your miter saw back to 90 degrees and follow the cut list. If you have the space try assembling the frame on your bench or a flat floor. You can clamp the frame together to make everything flush before lag bolting it in place. Once the frame is together and you are ready to insert your first A-frame set your saw back to 5 degrees. It is much easier to cut the spacer blocks on a bench so that you can get a nice snug fit. You want to be able to tap these parts in place to keep the a-frame rigid and free from racking even without fasteners. I then moved this all to the floor as the assembly was starting to get heavy.
5. Final Assembly
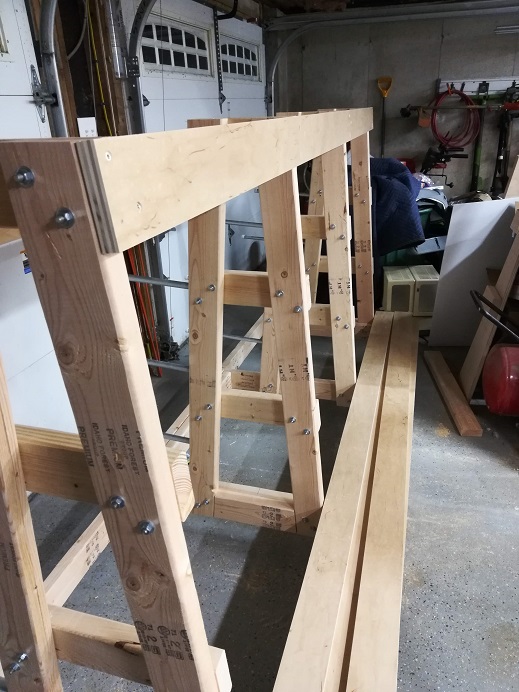
On the floor I set a ledger under the frame so that when I set the first a-frame in place it would be flush with the bottom of the frame. Clamp these parts in place so they are flush and fasten the spacers to the outer rail. Then clamp in the final full width rail and drill ¼” clearance holes through each a-frame for fastening. The third rail can be fastened with screws from outside the frame. With the first a-frame bolted in place you can repeat the process for the other end. I then flipped the rack on edge and installed the casters with lag screws, offsetting them to avoid other fasteners that were installed previously.
Finally, we can install the intermediate frames. You can clamp a ledge block underneath the rail so that it can sit on it and be flush with the bottom of the frame. You can center it by cutting a piece the inside with of the a-frame and then marking center on the base frame. Line those up and it will all align much better later for each frame in line. Bolt these other two frames in place.
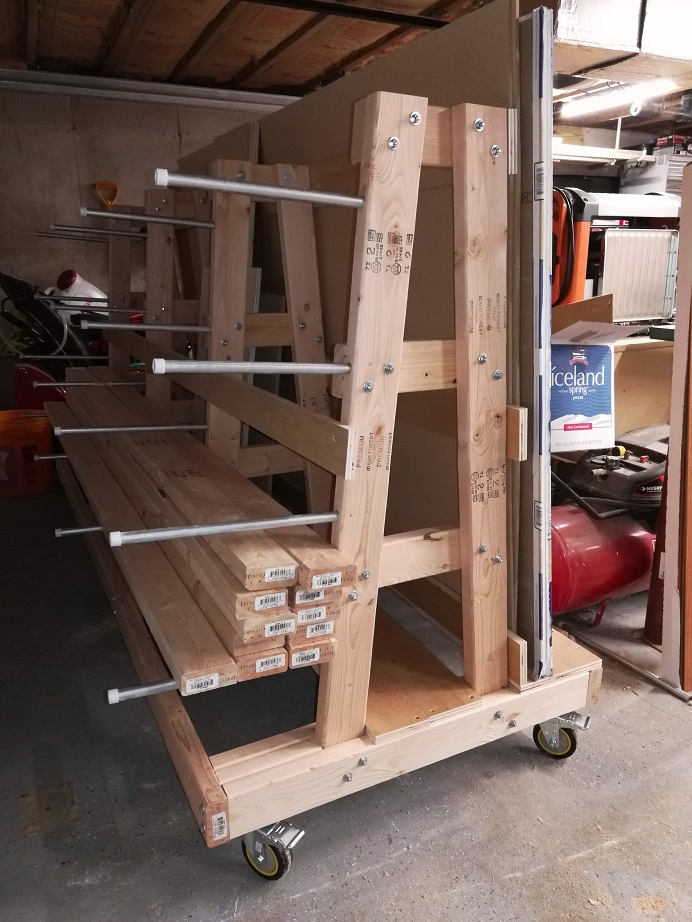
Next rip the plywood parts that will serve as both the base and intermediate outside plates for resting the plywood against. This also serves to stiffen up the frames and keep them at the same spread. You can install them by measuring so that the bottom interior width matches the top.
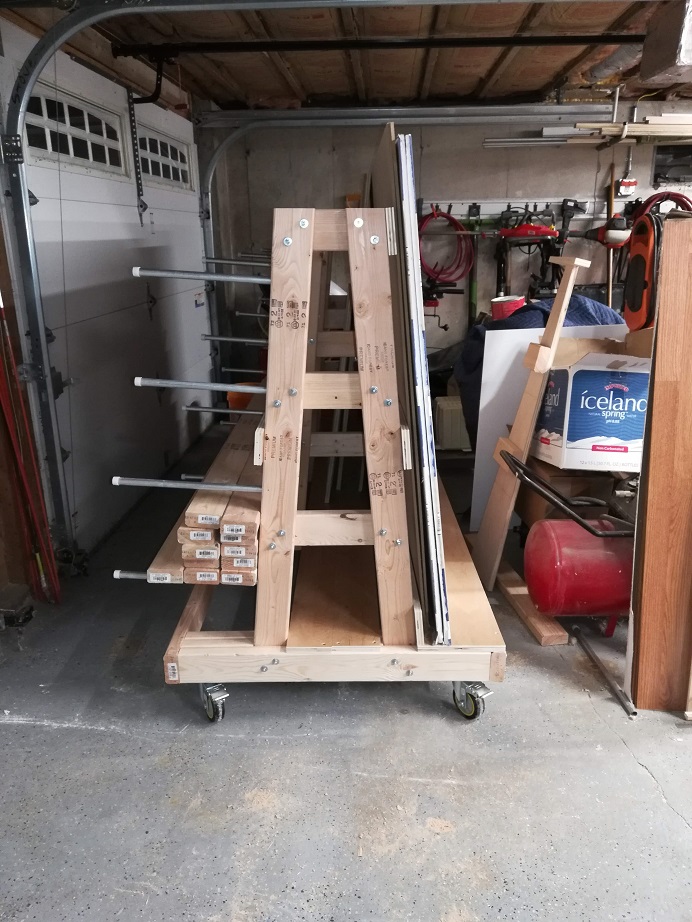
6. Final Consideration
You can use the new mobile rack per your needs, but you may consider installing a ledger on the front of the plywood side so that the plywood doesn’t fall out. You could also store lumber down the interior of the rack or use It as I do for plywood drops. I hope you enjoyed this project, please leave your comments and questions below!
Helpful Links
Some of the items below contain affiliate links which help this website.
Tools used for this project
Milwaukee M12 Fuel Drill Kit
Milwaukee M18 Fuel Drill Kit
Makita Track Saw
Sawstop Table Saw
Bessey K Body Clamp
Fastcap Tape Measure
Self Centering Drill Bits
Bosch Spade Bits
Fuji Minimite 4 Spray Gun Kit
Jet Drill Press